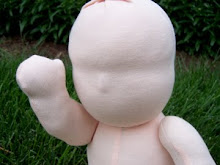
This section is the first of a series on how to sew on hair in the traditional 3-layer hair style.
Adding hair is my favorite part of baby-making. Once you get the hang of it, it's meditative, soothing and more than anything, really brings the life into the doll. Also - what's more fun than fantasy doll hair, really?
To get started, let's get your supplies together...
A word on yarn:
There are so many ways you can go! You can use just one yarn, or mix it up with a whole bunch! Colors and textures galore are to be found by a quick web search. You can go with straight yarn, or else a boucle to get a curly look. I like to use a mix of 4-5 yarns to get a mix of hi-lights and low-lights, as you will see with my gorgeous demonstration redhead. I will make two recommendations (one's a shameless self-promotion, I confess).
1. Wool rules! Cotton and manmade yarns tend to pill and get otherwise nasty over time. Wool is great stuff, it has a natural luster, is water-resistant (and doesn't catch on fire easily), and is available in every color under the rainbow.
 2. You really don't need all that much yarn. If you would like to get a variegated effect (like what I'm demonstrating). Rather than buy five skeins, you can save money by purchasing one of the doll wigs in my shop. I have tons of hair-yarn and take requests. Just email me or convo me and I'll be happy to help!
Supplies
For this section:
-doll
-yarn
-scissors
-strong thread in a corresponding color (I recommend Gutterman or Coat's & Clark - the polyester blends don't break as much as cotton - fyi - you're going to be pulling pretty hard at times)
-access to a sewing machine for ten minutes
For later sections:
-A water or air-soluble marking pen
-3 1/2 - 4" doll-maker's needle
-some glass headed pins or safety pins
You will be making three bundles of hair to sew on in three separate layers. Each bundle should be approximately the same length and amount. Take your yarn around your hands and loop a new skein to be the about two inches longer than the length of hair you would like your doll to have (you will cut it when you're finished). Measure it by placing it on your doll to check.
This is not an exact science due to the variety of yarn and the doll head, but you want the bundle to cover the forehead to the crown of the head. It does not have to be exact, for you can add or take away hair later.
 When you're finished, your skein should look like this...
 Step 2: Repeat Step 1 two more times so that you have three bundles.
Step 3: Sew your hair
This option is not required, but is HIGHLY RECOMMENDED - it makes the hair much easier to sew on. Go to your sewing machine (or borrow one from a friend - or take the hair to an alterations shop) and sew a straight stitch down the center of each bundle of hair so that they look like this...
Step 4: Snip the ends of the hair - so that they are no longer looped, but free hanging like hair and you are ready to move on to the next section!


